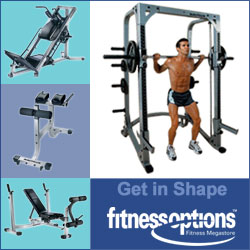


Transforming your physique doesn't require an expensive gym membership or fancy equipment. With the right knowledge and approach, your living room can become the foundation for impressive strength gains. Fitness Option specializes in helping fitness enthusiasts create effective home workout environments that deliver professional level results without the professional level price tag.
Weight lifting bar workout for beginners doing it at home is the new normal, as more and more people are realizing the benefits of lifting in their own space. You can forget about the hassle of commuting to crowded gyms, waiting for machines, or feeling self conscious about your form. When you are in control of your environment, you are in control of your results.
Whether you're an absolute novice or looking to step up your home workout game, this comprehensive guide will teach you all you need to know about weight lifting at home. Let's work on building strength, confidence, and the body you've always dreamed of, all without ever setting foot in a commercial gym.
Get Ripped at Home: The Definitive Guide to Weight Lifting
Weight lifting isn't just for bodybuilders, it's for anyone who wants to become a stronger, better version of themselves. The benefits go far beyond just looking good, stronger bones, faster metabolism, improved mood, better posture, and more strength for everyday tasks. The research is in, strength training is one of the best forms of exercise for overall health and lifespan.
One of the best things about lifting weights at home is that it’s so convenient. There’s no need to spend time travelling to the gym and back, which means you can use those 30-45 minutes to focus on your training instead. Whether you’re an early bird who likes to work out at the crack of dawn, or a night owl who prefers to lift weights at midnight, you can do it. It’s completely up to you.
Sticking with your workout routine is the most important factor for achieving your fitness goals. Home weight lifting eliminates many of the obstacles that can get in the way, such as the time it takes to travel to the gym, inclement weather, and limited gym hours. This isn't about finding a short term solution, it's about creating long lasting habits that will provide results for years to come.
Setting Up Your Home Gym: What You Need and How Much Space You Need
Building a home gym that works for you begins with knowing what space you have to work with and what your fitness goals are. The best part? You don't need nearly as much space as you might think. Even a small space can be transformed into a fitness haven with a little creativity.
How Much Space Do You Really Need?
You might think that you need a whole room to effectively lift weights, but that's not the case. The smallest space you need for basic strength training is about 6×6 feet. This is enough room to do basic movements like squats, deadlifts, and overhead presses with good form. If you can, try to get an 8×8 foot space. This gives you a little more room to breathe and lets you do more exercises. Don't forget about the height of your ceiling! You should have at least 12 inches above your reach when you're standing up straight and reaching overhead.
Essential Workout Equipment for Beginners for Less Than £200
Setting up a home gym doesn't have to cost a fortune. For less than £200, beginners can buy all the essential equipment for a full body workout. Start with a set of adjustable dumbbells (usually £30-80) that can be adjusted to weigh between 5-40 pounds. This means you don't need to buy several pairs of fixed weight dumbbells. Add a good quality exercise mat (£15-30) for floor exercises and to protect your floors from the weights. A flat bench (£40-80) will increase the number of exercises you can do and help you maintain good form when doing presses, rows, and step-ups. Finally, resistance bands (£10-20 for a set) are versatile and can be used for assistance exercises, warm-ups, and even as a substitute for dumbbells.
With this basic setup, you can do hundreds of effective exercises that target every major muscle group. As you get stronger and better, you can slowly add specialized equipment without spending money on things you don't need that just gather dust.
Intermediate Setup: The Next Step
When you've built a solid routine with your basic gear, clever upgrades can really open up your workout possibilities and progress potential. The mainstay of an intermediate home gym is usually a power rack or squat stand (£200-400), which not only keeps you safe during heavy barbell movements, but also serves as a central point for various exercises. Couple this with a barbell and weight plates (£150-300 for a beginner set), which allow you to increase the weight in smaller increments and lift more weight than just using dumbbells.
Think about incorporating an adjustable bench that inclines and declines (£80-200) to hit chest and shoulder muscles from all angles. Kettlebells (£20-80 each) bring in explosive training options and unique stability challenges that complement traditional barbell and dumbbell work. A pull-up bar, either standalone or rack mounted, enables crucial vertical pulling movements that are hard to duplicate with other equipment. These additions may be an investment of £500-1000, but they create a gym that can support years of intense strength development.
Top Notch Home Gym Equipment for Serious Weight Lifters
For those who are truly dedicated to weight lifting and want to create a full fledged training environment at home, specialized equipment can make home training just as effective as training in a commercial gym. A top of the line power rack with a cable attachment (£800-1500) can serve as the central hub of your home gym, allowing for both free weight and machine style exercises. Olympic grade barbells and calibrated plates (£500-1000) offer the precision and durability necessary for heavy and frequent training. You might also want to consider adding specialty bars such as trap bars, safety squat bars, or Swiss bars (£200-350 each) to your home gym to reduce the stress on your joints and target your muscles from different angles. Cable machines or functional trainers (£700-2000) can provide smooth resistance profiles and unique movement patterns that can't be achieved with free weights alone.
The 7 Key Exercises for Building Full Body Strength
When it comes to weight lifting bar workout for beginners training, the best programs are those that focus on compound movements that work several muscle groups at once. If you concentrate on these seven key exercises, you'll build functional strength that can be used in everyday activities, and you'll get the most out of your workouts. These movements are the foundation of any successful strength program, no matter what you're trying to achieve.
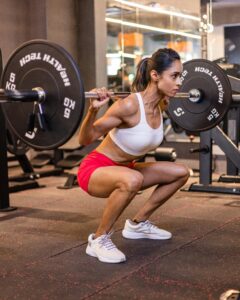
1. Squats: Get the Best Results with Proper Form
Squats are often referred to as the king of exercises because they target almost every muscle from the waist down while also engaging your core and back as stabilizers. If you’re working out at home, you should start with bodyweight squats to get the hang of the hip hinge movement pattern. To do this, stand with your feet shoulder width apart and your toes slightly turned out. Then, lower yourself by pushing your hips back and bending your knees until your thighs are parallel to the floor. Make sure to keep your chest up and your spine neutral throughout the movement. As you get better, you can add resistance by holding dumbbells at your sides, placing a barbell across your upper back, or even using a heavy backpack if you’re a beginner.
Common errors in form include letting the knees cave inward, lifting the heels off the ground, or rounding the lower back. If mobility is a problem, try slightly elevating your heels on weight plates or doing box squats until your flexibility gets better. Try to do squats 1-2 times a week with progressive overload to see continuous strength growth.
2. Deadlifts: The Right Way to Avoid Getting Hurt
Deadlifts are the best for building overall posterior chain strength, they work your hamstrings, glutes, lower back, and traps all at once. Start with lighter weights to get the form down before adding a lot of weight. Stand with your feet hip width apart, the bar over the middle of your foot, and bend at the hips to grab the bar just outside your legs. Keep your spine neutral and chest up, push through your heels while at the same time extending your hips and knees to stand up straight with the weight. Lower the weight by doing this in reverse, hinging at the hips first.
If you don't have a barbell at home, you can still do deadlifts with dumbbells or kettlebells. The key is to keep your back straight, engage your core, and use your legs and hips not your back to lift. Start with one or two sets of five to eight reps per week, and make sure your form is good before you add more weight or do more reps.
3. Bench Press: Sculpt a Strong Chest at Home
The bench press is an effective exercise for developing upper body pushing strength, primarily targeting the chest, shoulders, and triceps. Dumbbell variations provide a safer option for home training without a spotter, and they also allow for a greater range of motion than a barbell. Begin by lying on a flat bench with your feet firmly on the ground, holding the dumbbells directly over your shoulders with your palms facing forward. Lower the weights in a controlled manner until your elbows are bent at about 90 degrees, then push back up to the starting position while keeping your entire body tense.
Don't have a bench? No problem! Floor presses (done while lying on the floor) are a safe alternative that naturally limits the range of motion to protect your shoulders. For those with limited equipment, elevated push-ups with your hands on sturdy chairs or coffee tables can provide substantial resistance. Do variations of the bench press 1-2 times a week, starting with 3 sets of 8-12 reps.
4. Overhead Press: The Must Have for Strong Shoulders
The overhead press is a great way to build strength in your shoulders and upper body, and it also works your core. To do this exercise, stand with your feet hip width apart and hold the dumbbells at shoulder height, with your palms facing forward. Tighten your core and glutes, then push the weights up until your arms are straight. Lower the weights back down to the starting position, controlling the movement. To avoid arching your back too much, keep your ribcage down and your core tight throughout the exercise.
If you're dealing with shoulder mobility problems or if you're working out in a space with low ceilings, the landmine press is a great option. You'll need to tuck one end of a barbell into a corner (use a towel to protect your walls) and add weights to the other end. Hold the weighted end at the height of your shoulder and then press forward and up at about a 45-degree angle. This slight change in direction helps to reduce the risk of shoulder impingement but still gives your deltoids and triceps a good workout.
5. Rows: Strengthen Your Back and Improve Your Posture
Rowing exercises are essential for balanced muscle development, as they work the frequently overlooked muscles in the upper and middle back. Bent over dumbbell rows are probably the best and most convenient option for home workouts. Lean forward at the hips with a straight back, holding a dumbbell in each hand with your arms straight. Pull the weights up to your ribcage, pushing your elbows back and squeezing your shoulder blades together. Lower the weights slowly and then repeat the exercise.
Another great option that requires minimal equipment is inverted rows using a sturdy table, desk, or barbell set in a rack. Get under the edge, grab with an overhand grip, and pull your chest to the surface while keeping your body rigid. The more horizontal your body is, the greater the challenge. Try to do rowing movements at least twice a week, with 3-4 sets of 8-15 repetitions to build both strength and muscular endurance in the back muscles.
6. Pull-Ups: A Step by Step Plan for Beginners to Advanced
Pull-ups are the ultimate test of upper body pulling strength, but they can be tough for beginners. Start with negative pull-ups to build up your strength, use a chair to get your chin above the bar, then lower yourself as slowly as you can. Resistance band assisted pull-ups are another great way to work your way up, secure a band around your pull-up bar and put your feet or knees in the loop to lighten the load you're lifting.
If you don't have a proper pull-up bar, a doorway model is a cheap solution that doesn't require any permanent changes to your home. Once you're able to do several clean pull-ups, you can make it harder by adding weight. You can use a backpack, a weight vest, or a dumbbell that you hold between your feet. Or, you can try different kinds of pull-ups like wide grip, close grip, or chin ups (where your palms face you) to keep challenging your muscles in new ways.
7. Lunges: A Total Lower Body Workout
Lunges are a great way to target each leg individually to even out muscle imbalances, while also improving your balance, flexibility, and coordination. Start with walking lunges using just your body weight. Step forward with one foot and lower your body until both knees are bent at a 90-degree angle. Then, push off with your front heel to stand back up. Make sure to keep your upper body straight and your core tight the whole time.
As you get more comfortable, try holding dumbbells at your sides or a barbell across your upper back for added resistance. You can also try different variations such as reverse lunges (stepping backward), lateral lunges (stepping sideways), or deficit lunges (with the back foot elevated) to target different parts of your lower body. The best part about lunges is that they don't require a lot of space, making them perfect for home workouts. You can do most lunge variations even in a small apartment with a bit of creativity.
Developing a Home Lifting Routine for Quick Strength Improvements
Creating a successful home weight lifting bar workout for beginners routine means finding the right balance between frequency, intensity, volume, and recovery. Study after study shows that structured programming with progressive overload is far more effective than random “workout of the day” methods. While individual responses can vary based on genetics, experience level, and recovery capacity, there are certain principles that are consistent across successful strength development routines.
Three Day Split for Optimal Recovery
A well thought out three day training split provides the perfect balance between stimulus and recovery for most people who lift weights at home. The push, pull, legs framework offers a proven structure that ensures comprehensive development while avoiding overtraining. Day 1 focuses on pushing movements (chest, shoulders, triceps), Day 2 targets pulling movements (back and biceps), and Day 3 develops the lower body (quadriceps, hamstrings, glutes, calves). This approach allows each muscle group approximately 48-72 hours of recovery before being targeted again, which research shows is optimal for strength development and hypertrophy in intermediate lifters.
If you want the best results, you should spread your workout days throughout the week. Make sure there's at least one day of rest between sessions that focus on the same muscle groups. A schedule of Monday/Wednesday/Friday or Tuesday/Thursday/Saturday usually works best for most people. Each session should be 45-60 minutes of concentrated effort. Start with compound movements when you're at your peak, then do isolation exercises to focus on particular muscles. Finish each session with 5-10 minutes of mobility work to help with recovery and keep you flexible.
Tracking and Implementing Progressive Overload
Without progressive overload, your strength training results will plateau. This principle of gradually increasing the demands on your muscles over time is the backbone of all successful strength training programs, forcing your muscles to adapt and grow. While commercial gyms make this easy with their extensive range of equipment, at home you have to be more strategic about progression. The first step is to keep a training journal, either digital or physical, where you record the exercises, weights, reps and sets for each workout. This gives you an objective record and helps avoid the common mistake of training at the same intensity week after week.
Adopt progressive overload in various ways depending on the equipment you have. The easiest way is to add weight, add 2.5-5 pounds to your lifts when you can do all the reps with good form. If you don't have a lot of equipment, do more reps (for example, go from 8 to 12 reps before you add weight), take more time to lift (slower lifting tempos), rest less, or get better at the technical parts. For bodyweight exercises, make them harder by lifting your feet for push-ups, doing squats with one leg, or adding paused reps.
Try to improve at least one aspect of each exercise every week or two, but understand that progress isn't always a straight line. Some days you'll feel stronger than others, and that can depend on how well you've slept, what you've eaten, and how stressed you are. The important thing is to see an overall trend of improvement over the course of several months, rather than worrying about daily ups and downs.
Optimizing Rest Periods and Training Tempo for Best Results
Your chosen rest periods between sets can have a huge impact on your training results, depending on what your main goals are. If you're looking to increase your strength, studies have shown that resting for 2-5 minutes between heavy compound lifts allows for full phosphocreatine replenishment and ensures you can perform at your best for the next set. If you're aiming for muscle growth (hypertrophy), a moderate rest period of 60-90 seconds is recommended to maintain metabolic stress while also allowing enough recovery time to maintain good form. For those looking to improve muscular endurance or burn calories, shorter rest periods of 30-60 seconds will keep your heart rate up for the duration of your workout.
The speed at which you perform your reps, or your training tempo, is another powerful tool you can use to progress in your home training. This is typically described in four digits (for example, 3-1-2-0). The first number is how long you take to lower the weight (the eccentric phase), the second is how long you pause in the stretched position, the third is how long you take to lift the weight (the concentric phase), and the fourth is how long you pause in the contracted position. Slowing down the eccentric phase to 3-4 seconds can significantly increase muscle fibre recruitment and growth stimulus without needing to add more weight. This is especially helpful for those lifting at home with limited equipment.
Basic Nutrition to Power Your Home Workouts
No matter how good your weight lifting bar workout for beginners training program is, it won't produce the results you want without the right nutrition. Your body needs the right kind of fuel to perform at its best during workouts, and it needs the right materials to repair and strengthen your muscles afterward. There are whole books on sports nutrition, but if you're lifting at home, you should start by getting a few basic principles down before you worry about more advanced strategies.
How Much Protein Do You Need for Muscle Development?
Protein is the key nutrient needed for muscle recovery and growth after a weightlifting workout. Studies have shown that the best amount of protein to consume is between 1.6-2.2 grams per kilogram of body weight each day for people who do regular strength training. This means that a 175-pound (79.5kg) person should aim for about 127-175 grams of protein spread out over the day. Try to get your protein from high quality sources like lean meats, dairy products, eggs, fish, and combinations of legumes and grains if you follow a plant based diet.
When you eat your meals also impacts how your body uses protein. Studies have shown that having 20-40 grams of protein within a few hours of working out (either before or after) helps your body build muscle the best. So, to put this into practice, try to eat meals or shakes that are rich in protein every 3-5 hours while you're awake. This will keep your body in a positive protein balance, which means that there are always amino acids available for your body to use to repair tissues. And the best part is that you don't have to obsess over exactly when you eat your meals, which can make it hard to stick to your plan.
Easy Guide to Pre and Post Workout Nutrition
Pre-workout nutrition should provide easily accessible energy that won't upset your stomach during your workout. Eat a balanced meal with a moderate amount of protein (20-30g) and carbohydrates (30-60g) and minimal fat 2-3 hours before your workout for optimal performance. If you're working out on an empty stomach or several hours after you've eaten, a smaller snack of easily digestible carbohydrates (like a piece of fruit or a rice cake with honey) 30-60 minutes before your workout can give you quick energy without upsetting your stomach.
After a workout, it's all about refuelling your body with the right nutrients. You should aim to get a good balance of protein (20-40g) and carbs (40-80g, depending on how hard you've been working out) within an hour or two of finishing your workout. While it's not as crucial to eat immediately after a workout as we used to think, eating regular meals around the time of your workouts can help keep your energy levels consistent and help your body recover. Easy options include a protein shake with some fruit, Greek yoghurt with granola, or a full meal like chicken breast with rice and veggies.
Staying Hydrated for Optimal Performance
Not drinking enough water can quickly affect your strength performance. Studies have shown that losing as little as 2% of your body water can decrease your power output by 10-20%. If you're lifting at home, start each day by drinking plenty of water and keep drinking throughout the day. Don't wait until just before your training session to hydrate. As a general rule, try to drink between 0.5 and 1 ounce of water for each pound you weigh every day. You should also drink extra water during and after your training sessions.
Water is generally enough for workouts under 60 minutes, unless you're training in intense heat. For longer workouts, you should add electrolytes to help keep the right fluid balance and avoid cramps. After your workout, you should drink about 16-24 ounces of fluid for every pound you lost during the workout. A good way to do this is to weigh yourself before and after your most intense workouts to see how much you sweat and adjust your hydration plan.
Typical Home Lifting Blunders and How to Dodge Them
Achieving your home weight lifting goals requires steering clear of the usual traps that hinder progress. By learning from the blunders of others, you can fast track your gains while reducing aggravation and the risk of injury. The following mistakes are the most common issues home lifters encounter, along with actionable advice to tackle each hurdle.
Mistakes in Form That Can Cause Injury
When you're lifting weights at home without a professional trainer, it's easy to develop bad habits that can hinder your progress and increase your risk of injury. One of the most harmful mistakes you can make is using momentum to lift the weights, rather than controlled muscle contractions. This is often referred to as “ego lifting,” and it shifts the stress from the muscles you're trying to target to your joints and connective tissues, which are more vulnerable to injury. To avoid this, try filming yourself lifting from different angles so you can objectively analyse your form. You can then compare your technique to online demonstrations from reputable strength coaches.
A common mistake that many people make is overextending the range of motion beyond what their body can handle. While it's generally good to have a full range of motion, forcing your body into positions it's not ready for (like deep squats with your heels off the ground or bench presses that overextend your shoulders) can cause unnecessary stress on your joints. Instead, work within the range that you're comfortable with while also working on improving your mobility through targeted stretching and corrective exercises.
Incorrect setup of equipment, such as adjustable benches and racks, can exacerbate form issues. Make sure all parts are correctly secured before loading heavy weights. Position your equipment in a way that promotes the best movement patterns, rather than adjusting your form to accommodate for a difficult setup. If you're unsure about the correct technique, lower the weight and perfect your form before moving on, even if it slows down your strength progress for a bit.
Common Mistakes in Training Frequency
One of the pitfalls of weight lifting bar workout for beginners training at home is the temptation to work out too often, hitting the same muscle groups day after day without enough rest. Your muscles don't grow during the workout itself, but during the rest periods in between. Most people who aren't using performance enhancing drugs should work each muscle group 2-3 times a week, leaving at least 48 hours between sessions that target the same area. If you're not recovering enough, you might notice that you're not able to lift as much weight, your muscles are sore all the time, you're having trouble sleeping, or you're just not as motivated to work out.
On the other hand, some people who lift weights at home don't do it often enough because they get distracted or don't stick to a schedule. When you don't have a gym membership or a class to go to, it's easy to skip workouts or put them off forever. Make sure you schedule your workouts and think of them as being as important as a work meeting or a doctor's appointment. Also, if you have your equipment set up and ready to go instead of having to put it together every time, you'll be more likely to stick to your schedule.
Common Recovery Misconceptions
Many people who lift weights at home don't fully understand the recovery process beyond just taking rest days. The quality and amount of sleep you get each night directly affects the hormone levels in your body that control muscle repair and growth. You should aim to get 7-9 hours of good sleep every night and try to keep a consistent sleep schedule even on days when you're not training. You can manage stress through meditation, spending time in nature, or other relaxation practices. Having chronically high levels of cortisol can hinder your recovery and promote muscle breakdown.
Often, nutrition blunders can sabotage your recovery, particularly if you're not eating enough calories while trying to build strength. While it's crucial to keep your body composition in check, severely limiting your calorie intake will make it nearly impossible to progressively overload your muscles. Evaluate your results every two to three weeks, if you're not seeing any strength gains despite sticking to your program perfectly, gradually add 200-300 calories to your daily intake until you start making progress again, focusing on protein and complex carbs around your workouts.
Advanced Techniques to Break Through Plateaus
Tempo Training for Muscle Growth
When progress stalls with conventional lifting, manipulating repetition tempo offers a powerful stimulus for new development. By extending the time under tension, particularly during the eccentric (lowering) phase, you create microscopic damage to muscle fibres that triggers growth when repaired. Implement a 4-1-2-1 tempo for upper body exercises and a 4-2-1-1 tempo for lower body movements, focusing on complete control throughout each repetition. This approach transforms familiar exercises into new challenges without requiring additional equipment.
Drop Sets When You're Working Out Alone
Drop sets help you push past your initial failure point by immediately reducing the weight and continuing repetitions without rest. If you're training at home and don't have a spotter, adjustable dumbbells or resistance bands are a great way to do this. For instance, if you're doing a chest press with 40-pound dumbbells and reach failure, quickly reduce the weight to 30 pounds and keep going until you reach failure again, then drop to 20 pounds for a final burnout set.
You’ll get the most out of this technique if your equipment lets you change weights quickly. To cut down on the time it takes to switch between drops, you should get your weights ready in advance. You should only do drop sets for 1-2 exercises in each workout. They’re best used for isolation exercises or as a way to finish off a workout for a major muscle group. That way, you won’t get too tired and it won’t be as hard to recover. But because they’re so intense, you should only start doing drop sets after you’ve been working out consistently for several months.